
 Tormach offers a power draw bar option for $1200. After already spending a chunk of change on the machine and other accessories, I found it hard to stomach to pay another $1200 for what amounted to be an air cylinder, air valve, and some machined steel plates and hardware.Also, I design machinery with pneumatic automation, and have cylinders, valves, etc lying around just waiting to be used for a project like this.
Tormach uses a 3 stage air cylinder with a bore diameter of 100mm. The part# of their air cylinder is CQ2B100x12-3, and it's made by a company in China called XINYIPC. These cylinders are a copy of the SMC CQ2 series cylinders. Basically they've taken 3, 100mm bore by 12mm stroke air cylinders, and stacked them in series to multiply the force times 3.

Part # of the Tormach Air Cylinder
At first I considered using an impact style draw bar, like is commonly used with bridgeport style milling machines that use an R8 taper. This is a proven, effective, cheap method to change R8 tooling. I spoke to someone who had done this for their Tormach, and later switched over to Tormach's power draw bar solution, and said that theirs was by far better. The main problem he had was stripping the draw bar bolt, and he was spending too much time keeping the thing working. This could probably be resolved by improving the lead in for engagement, and only activating the impact wrench once properly engaged. The problem I was trying to figure out (without having the mill available to test the idea) is how to loosen the collet just enough to allow the TTS toolholder to slip in and out, without the impact driver completely unscrewing the collet from the draw bar. There needs to be something that limits the rotation. I may experiment with this later to see if I can find a solution.
The second idea was to use an air cylinder that I already have that has a smaller diameter than what Tormach uses (100mm), but a longer throw, and use a lever to increase the applied force. Although not that difficult to build, it is still more complex then what Tormach has achieved using 3 stacked cylinders. Not yet having the mill at hand to take measurements, it was difficult to design something that I knew would fit.
While waiting for the mill, I did a little research on CQ2B100 air cylinders. SMC, the original manufacture sells a 15mm stroke for about $230. Take that times 3, and add the time machining open the backs in order for the rod end to push the piston of the next cylinder, machining grooves for o-rings to seal between them, and you may as well pay up the $1200 for Tormach's solution. From China, the cylinders can be purchased individually for about $25 each. I spoke with a vendor, and they said that they could make a 3 stage version for $125. Although I was interested in trying to make my own from individual cylinders, I thought that having them make it may be better since they have more experience. Of course shipping cost more at $130, but it's worth a try.

This is your basic SMC QC2 Air cylinder clone.

Looking at this cross section, it appears to me that it would not be difficult to machine a hole in the back of the cylinder, machine a groove for a seal, and sandwhich the air cylinders together.
3 Stage Cylinder Arrives!
And it's just what the engineer ordered! This is a nice looking, hefty cylinder for the price. Matches my specs, now we need to make the rest of the parts.

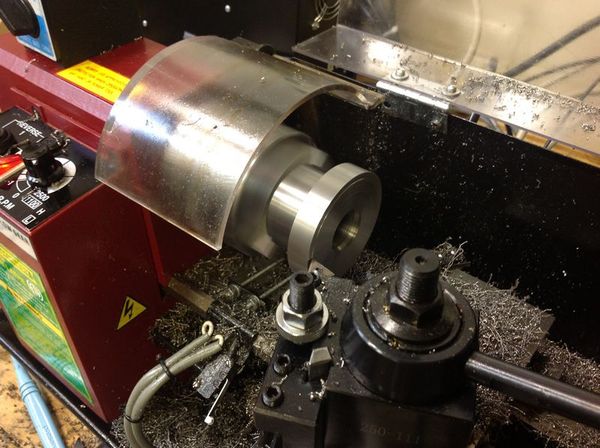
Machined Spindle Pully Nut
A new spindle pully nut had to be made that has a flange that the cylinder mount could grab onto when the cylinder is compressing. This elliminates any force applied to the spindle bearings.Since these were steel parts, which I did not have a lot of expereince machining, Helton did all the machining of these parts, and I assisted and learned.
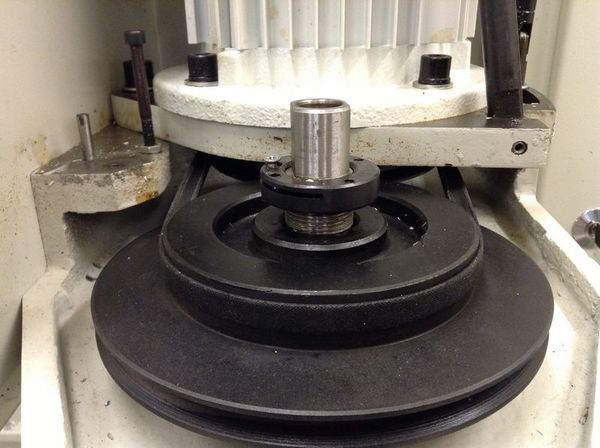
Replacing the Spindle Pulley Nut


Eccentric mounting pin
An eccentric mounting pin is used for fine tuning the position of the cylinder and cylinder mount such that it does not touch the spindle nut, and is concentric with the spindle.


So, How Does the DIY Power Draw Bar Work?
It works great, probably just like the one that Tormach sells. I wouldn't want to be without it, it's a huge time saver. However, the retention force is not good for end mills over 3/8 in, and this is a problem that has been discussed on many forums. At the recommended tension (2.5 turns of the draw bar after hand tight), it took about 95psi to release the tool. The pull out was horrible with a 1/2inch tool. I would have to go back to the original draw bar, and hand tighten in order to use a 1/2inch end mill without any pull out.I did a few things that greatly reduced (but not totally elliminated) the pullout.
How did I reduce the pull out.
- I have the release pressure set pretty high, in the 120psi range. This means tightening the drawbar more than 2.5 turns
- Ditched the Tormach TTS Collet, bought a Hardinge 3/4 R8 Collet, and ground the face down to allow clearance for the TTS Collets. This was a huge improvement in retention.
- Added an additional bellville washer pair, so now there's a stack of 4 pairs. This increased the travel, allowing the collets to release easier under the high force.
- Always make sure that the TTS shanks are clean, dry and free of lubricant. Keep the collet inner faces clean.
I split the new drawbar nut on one side, cross drilled it and tapped it 5mm, installed it and tightened the clamping screw and no more loosening drawbar nut! The setscrew will loosen at times, the clamping arrangement has been working for about a year now.
ReplyDelete